Last year I received more than a few requests from my lovely readers for posting more kid loving recipes and I was happy to oblige. So, I asked my friend’s kids what they love to eat the most. What I figured from their answers was that they would enjoy anything that is small, easy to hold, can be dipped and popped into their mouths. The very first thing that came to mind was cake pops. Don’t we all love cake pops? I am not sure why it took me so long to post this, but I am glad I am finally doing this. Cake pops are the cutest bite sized treats with big on taste Not only are they fun to eat, they are fun to make as well and a great way to use up leftover cake. The process may be time consuming but all in all (the rewards) they are well worth the effort.
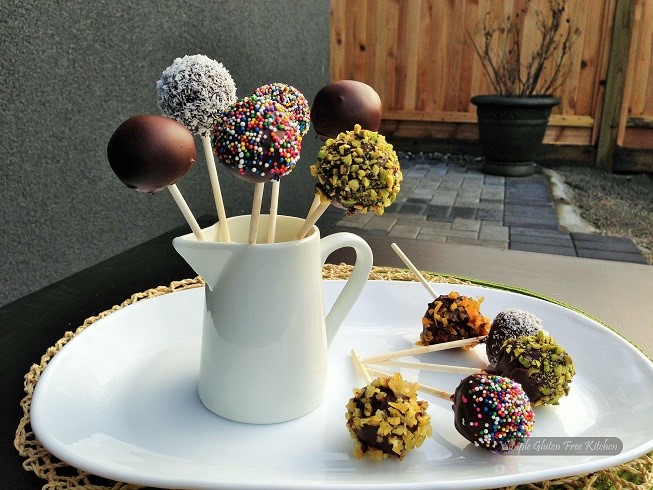
Most recipes call for a boxed cake, store bought frosting and shiny decorative sugar and colorful sprinkles. Well, they do look very pretty but often contain hidden gluten. I like doing things from scratch and from ingredients that are readily available in average supermarket.
These cake pops are made from a sponge cake to which I added a frosting made of nutella and cream cheese. Sponge cake yields better texture cake balls and gives you control to use various flavored binders. I love the balance of flavor, the slightly tangy cream cheese is a great match with rich sweetness of nutella. I added all the frosting little by little because my cake was dry. If you have a moist cake, add 3/4 of frosting and go from there. You want a play dough like texture that you can roll into a ball. Using a melon ball scooper make mounds of equal size . If you don’t have a scoop use 3/4 tbsp of the dough. Then roll each mound into a firm ball, place it on a cookie sheet I got about 20 balls. Cover with plastic wrap and stuck in the refrigerator for few hours to harden.
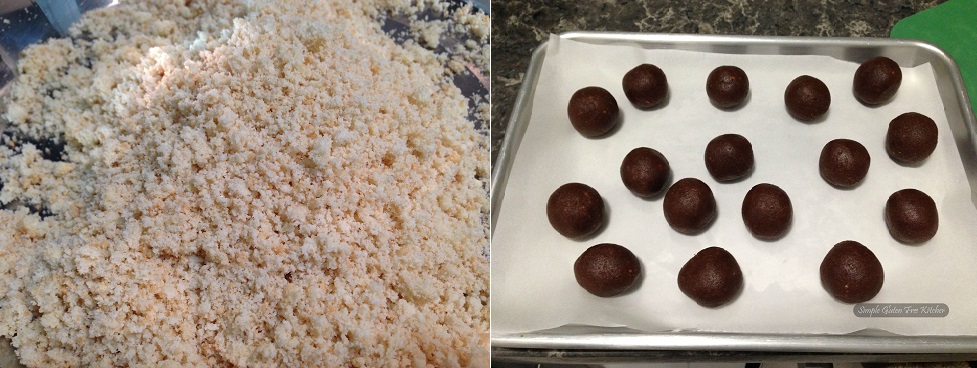
While the cake balls are in the refrigerator, get your decorating ingredients ready. I used unsweetened fine coconut, finely chopped pistachios, citrus candied peel and cake mate sprinkles. Canadian made cake mate sprinkles are gluten-free, dairy-Free, peanut-free and can be bought at any grocery store.
After chilling, it is time for dipping the cake balls. Candy melts are the most popular choice of coating used for cake pops as they are more consistent and do not need to be tempered. I prefer to use Hershey’s semi-sweet chocolate chips because they are easily available anytime. A house with kids is unthinkable without chocolate chips. Their coating is not as shiny and fancy but tastes pretty good. To melt chocolate chips either use microwave or a double boiler. If you don’t have a double boiler like me, use a pyrex bowl and set it on top of a saucepan. There should be enough space for an air gap between the bowl and boiling water.
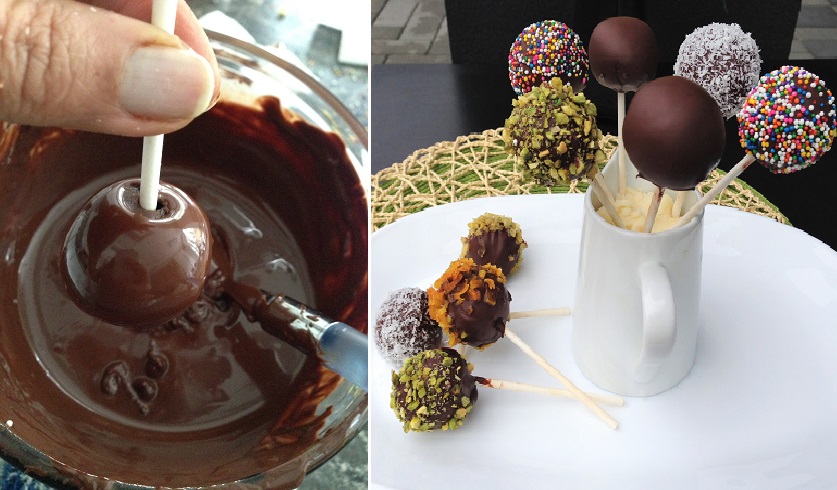
First you dip the lollypop stick in the melted chocolate and push it into the cake ball and put them in the refrigerator for little while. Once your cake balls have set up, it’s time to get to dipping! Reheat the chocolate for few seconds. While holding the lollipop stick, submerge the cake ball into the melted chocolate. Work quickly. Lift the cake ball out of the melts in a swirling motion or give it a gentle shake. While the coating is still wet decorate your cake pops. You can either sprinkle by hand or dip it in the sprinkles.
When it comes to storing these cake pops, you need to keep them in the refrigerator until ready to serve because chocolate chip coating won’t crisp as much at room temperature. They can be easily stored in the fridge for one week.
Cake pops look simple to make but can sometimes be a challenge. I am no expert cake pop maker but here are some Quick helpful notes for you that I learned the hard way from sites like Bakerella, Wilton and joy of baking.
- Crumble your cake with your hands or use a grater. Using a food processor or blender, sometimes make it mushy and clumpy.
- Cut the outer edges from your cake if they are too hard or else they will create lumps inside your pops.
- Avoid using cakes that contain fruit or are extremely moist, because when you add frosting the texture can become gooey.
- Don’t use too much frosting as it will make your cake balls too soft that won’t maintain their shape. Add frosting a little at a time until it binds together.
- The amount of frosting you add will vary based on the moisture of your cake recipe. You want your mixture just moist enough to roll into balls.
- Keep your cake balls small or else they will fall off the stick.
- Melt chocolate chips on low heat, stirring occasionally. The consistency of the melted chips is usually thick. Adding coconut oil or vegetable shortening makes it smooth, shiny and thin, but not runny. If you add too much oil it will weaken the chocolate and take much longer time to set. To see if your chocolate is fluid enough, scoop some up with a spoon and let it fall back into your bowl. It should fall back in a steady stream. If the chocolate is too thick and plops back into the bowl, you can adjust the consistency by adding a little oil.
- Use a deep and narrow bowl to hold your dipping chocolate. This is done so the cake pops can be fully submerged in the candy melts when dipped.
- Dip your sticks in chocolate then insert into chilled cake balls. Decide if you want your cake pops to have the stick facing down or up. Once all the cake balls have chocolate dipped sticks in them return to the refrigerator for at least 15-20 minutes.
- Dip the balls (one by one) into the melted chocolate chips until it is all the way covered (you may use the spoon to cover the entire cake pop), then quickly pull up. Hold the coated pop over the bowl at a 45 degree angle, and rotate it slowly. You can gently tap on your hand or wrist while rotating to shake off the excess chocolate. Do not tap the stick on the edge of the bowl. Doing so will risk your cake pop to fall off.
- Place your sprinkling decor in wide bowls or plates to catch falling sprinkles while decorating. Put them back in the fridge for final setting, once you have decorated.
Craving more of such recipes? Sign up for my simpleglutenfreekitchen blog and you’ll receive free recipes in your inbox. Or subscribe to my flipboard magazine and you can see all my recipes anytime on smart phone or tablet.
I am also on Facebook and Instagram.
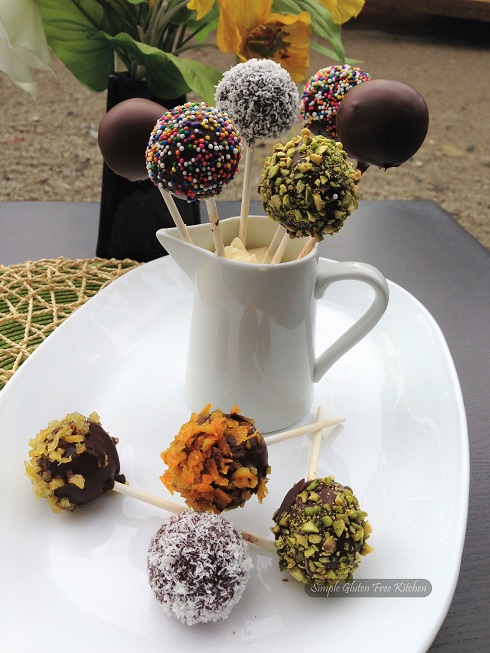
Super fun bite sized treats! Decorated with sprinkles, citrus candied peel, coconut and chopped pistachios, it will be a hit with kids and adults alike! You don't have to go to the store to buy candy melts, if you have a leftover cake. These cake pops are coated with plain old chocolate chips and decorated with ingredients you already have at home.
Ingredients
- 3 3/4 cups cake crumbs
- 1/4 cup cream cheese (at room temperature)
- 1/2 cup nutella (at room temperature, I put in the microwave for 20 seconds)
- 1 1/2 cup chocolate chips
- Lollipop sticks
- 1 1/2 to 2- tbsp. coconut oil
- Finally chopped pistachio or any nuts
- Unsweetened fine coconut
- Cake mate decor or colored sugar
- Citrus peel sprinkles (recipe follows)
- Crumbled cookies, finely chopped cranberries, raisins, walnuts (on white chocolate coating)
Instructions
- In the bowl of a stand mixer fitted with paddle attachment, or with a handheld beater, mix together the cream cheese and nutella until smooth and well incorporated.
- Line a baking sheet with parchment paper
- In a medium bowl, mix the cake crumbs and nutella frosting with spoon. (use the back of the spoon to press and mix) It should be moist enough and stick together when you grab a handful and squeeze gently.
- Scoop out 3/4 tbsp. of cake mixture and using your hands, form small balls and place on the prepared sheet. Cover with cling wrap.
- Chill it for 3- 4 hours in the refrigerator or freeze for 30 minutes. If you choose to freeze then slightly thaw before dipping) You want the balls to be firm, not frozen.
- When the cake balls are chilling, place the chocolate chips in a double boiler with 1 1/2 tbsp. coconut oil. Melt chocolate chips over low heat, stirring well. Stir in more coconut oil if it's still too thick, and mix.
- Have your garnish in plates, ready to use.
- Dip ½ inch of the cake pop stick into the melted chocolate, and push more than half way through into the middle of a cake ball. Do this for all cake balls and return the tray into the refrigerator for 15-20 minutes.
- Take out few balls from the refrigerator. Working with one cake pop at a time dip into the melted chocolate, and use the spoon to finish covering the entire cake ball. Once it is covered entirely with chocolate, hold the coated pop sideways over the bowl and rotate it slowly (you can also tap on the wrist with your other hand) while the excess coating drips off.
- When it is done dripping, decorate with various garnish and place the pop into cake pop holder/ craft foam block/ cheese block to dry. Repeat this for all of the cake balls. You may have to reheat your dipping chocolate little bit after you are done with half cake pops.
- Stuck the chocolate coated cake pops block in the refrigerator to dry and harden completely.
- Set two small pots of water to boil.
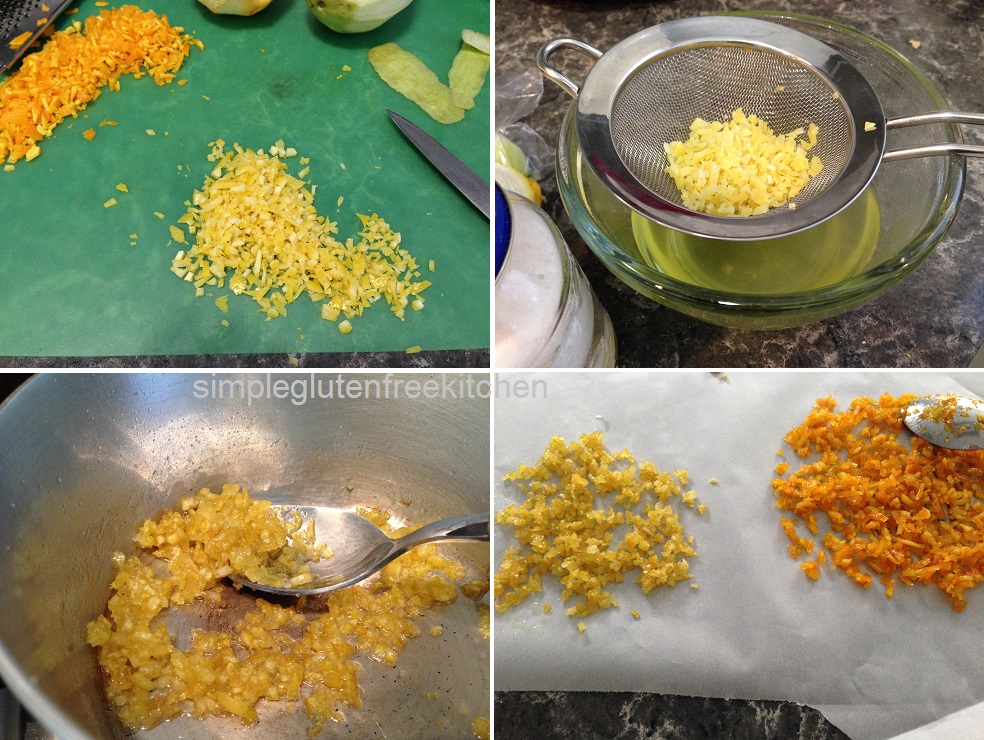
- Using a vegetable peeler or knife take thick strips of rind from one organic unwaxed orange and lemon ..
- Slice these strips into slivers and then into tiny pieces.
- When the water is boiling, drop the pieces into the water and cook for 1 minute (for orange) and 5 minute for lemon. Drain and rinse. Set aside.
- Melt 1 tsp coconut oil in a small pan. Add orange peel pieces and 2 tbsp sugar. saute for 5 minutes or until sugar is properly coated on the pieces . Follow the same process for lemon peel pieces with 1 tbsp sugar.
- Let dry on parchment paper.
Linked to Allergy Free Wednesdays, Tasty Tuesdays.


kelly
These look awesome! Love the idea of using candied peel for sprinkles.
Monica
What a fun post and such a great job with these cake pops. I hope you saved a bunch for your daughter! : )
I like that you used chocolate chips…chocolate melt is so much easier but you somehow feel like you don’t want to go there, right? And the citrus peel sprinkles is genius. They look fabulous…any kid would flip out over nutella cake pops that look this great.
Angie@Angie's Recipes
They look super duper delicious and beautiful!
Adina
I have to make cake pops every year for my son’s birthday, he looooooooooooves them! All the kids that are invited do actually. Yours look perfect!
Ami@NaiveCookCooks
Omg I yesterday bought nutella and so you can assume that I will be making these super soon!!
Shirley Tay (Blackswan)
Oh yes, I’ve been wanting to make cake pops since 2 yrs ago! Guess you beat me to it, Balvinder. Love your sweet treats! xoxo
Katerina
My son would devour them all! They look so cute!
Juliana
I love cake pops…and how convenient they are…but yet have to try making them…thanks for the recipe Balvinder.
Enjoy the rest of your week 🙂
Soma Saharay
Why kids…we are also loving it dear Balvinder…tempting….
Alida @My Little Italian Kitchen
They look lovely your cake pops! And so yummy with nutella. I have never made them, my children would really love them. Thanks for the recipe, I think I would make them all with nuts.. delicious!
Vicki Bensinger
I agree with you Balvinder that it’s always better to make cakes from scratch. I’ve made my cake balls both ways and for sure if you have a gluten intolerance it’s the way to go. Your cake balls sound delicious and look beautiful! From the looks of your friends daughter she’s in heaven eating them.