Roti is one of the main staple foods for Indians, especially for people from the Punjab region of India and Pakistan. Their meal would be incomplete without a selection of wheat roti, paratha, makki ki roti or naan. All of these flatbreads are incredibly flavorful, scrumptious, satisfying and loved by many across the world. Makki Ki Roti though, is not as well known, yet equally delicious. It is a comforting winter staple in Punjabi households and one of those foods that turns back the clock for me and evokes memories from my childhood. One such memory that I wish to share with you today is when I lived in Shillong ( a city in northeastern part of India). My mother would always cook roti on a portable clay stove. The hot roti right off the clay stove added a smoky flavor and tasted its best. A clay stove was necessary in every kitchen to not only cook food but also provide warmth as the climate of Shillong is quite cold and chilly in the winter. On most days when I would come home from school, the kitchen would be the main place me and my siblings would spend time.
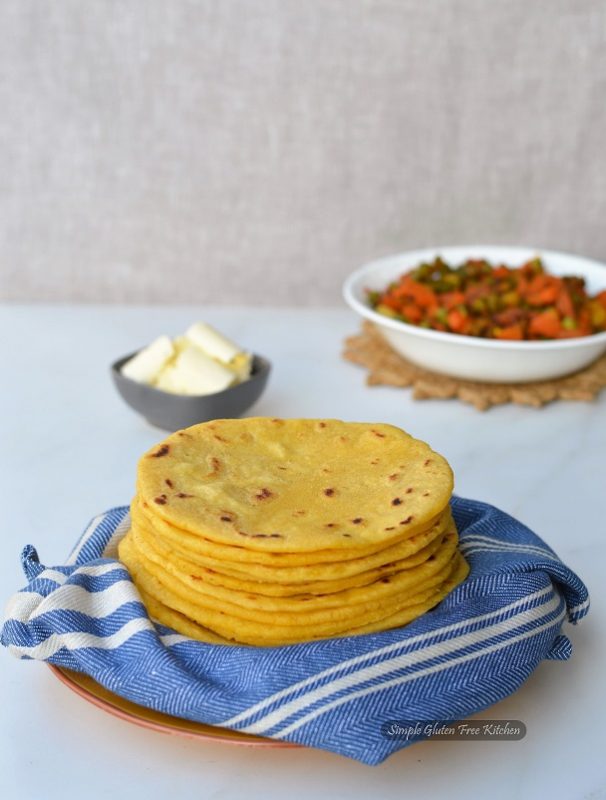
My mother would cook the rest of the food, such as lentil, stew, curry or vegetables early on. Then she would make hot makki ki roti one after another from the dough in a parat (a flat bottom shallow container for kneading dough). I would watch with delight as a small dough ball was flattened into a disc with wet hands and in seconds it would go on the griddle, then finished off directly over the coals. There it would swell and get a delicious charred crispness. I loved the entire experience of how she made something so wonderful from just two components. Then she would put butter on the cooked makki ki roti and present it to each one of us until we were content. What she served on our plates was every ounce of her love and it is something that I will never forget. Now being a mother myself, I find it equally satisfying to serve my family hot rotis (on gas stove though) with love.
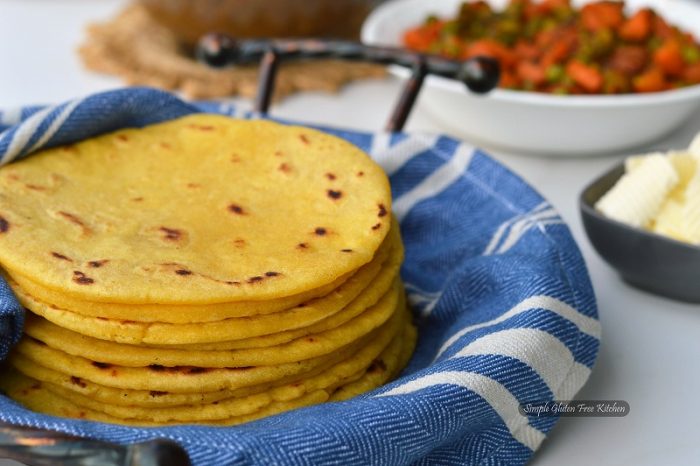
My mother made sure that I was well trained in the art of making makki ki roti. It isn’t a complicated recipe however mastering perfect makki ki roti is about technique and practice. A lot of you have been asking me on Instagram and Facebook to share a video of how to make makki ki roti. Making a video is not possible for now but I took the photos of roti making and am happy to share some tips that I learned along the way from my mother. When I eliminated gluten from my diet this roti was a true lifesaver.
So, lets head on to see which flour is required and how this roti is made with ease.
Which flour do you need?
Makki ki roti is an unleavened flatbread made from makki ka atta (otherwise known as maize flour in India) which is yellow in color. It is also referred to as corn flour in USA and Canada. I am not sure why is it called maize flour in India when the term corn is preferred over maize for food products that are made from it, such as cornflour, corn starch, cornmeal etc.
Corn flour comes in yellow and white and is generally used like wheat flour (see my GF white flour chapati with white corn flour). Though, do not confuse white corn flour (two words) with corn starch which is white in color, has superfine texture and is used for coating or to thicken, sauces, gravies or to add softness to dough. Corn starch is called cornflour (one word) in the UK, and possibly in Australia and New Zealand as well.
You can find certified gluten free yellow corn flour in Canada from Bob’s Red Mill and Millstream
Prepare the dough
Makki ki roti is made with just 2 ingredients, yellow corn flour and water, hence its naturally vegan, too.
Take yellow corn flour in a flat bottom shallow container. Knead the dough right. I cannot stress enough how important this is.
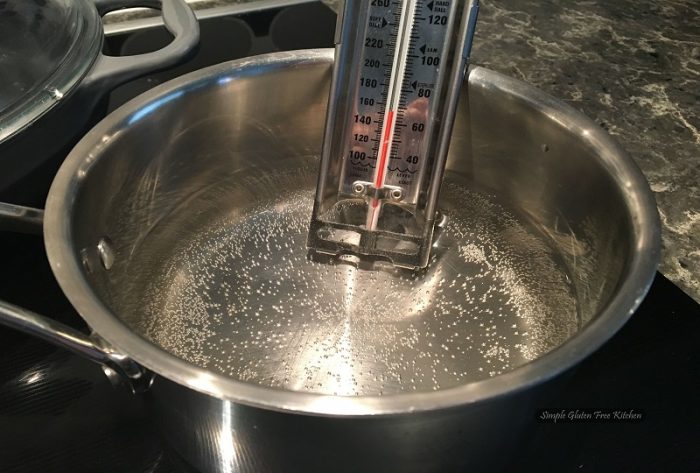
To knead the dough, heat water in a kettle, let it reach 150 degree F. If you are heating water in a pan, turn off the heat as soon as you see tiny bubbles in the water. This mean that the water is around 150 degrees F (too hot to touch with your hand), and ready to be used for kneading dough.
Slowly add hot water, mixing the corn flour and water with a spoon. Hot water helps obtain a softer dough that makes rotis easy to roll or patted.
Keep mixing with the wooden spoon until all the flour binds together, still crumbly. If you need more water add little by little. Because the corn flour won’t instantly absorb the water, you will have to wait a couple of minutes to see if you need more or not. The image below shows the texture you are looking for.
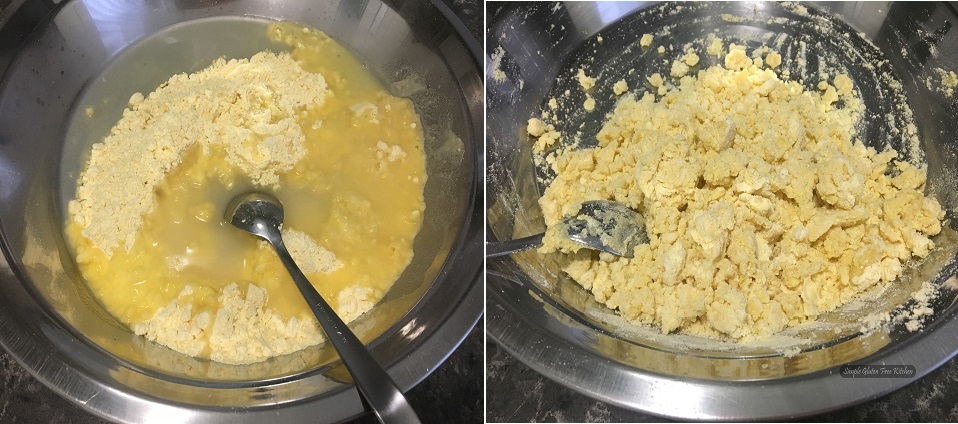
Once the dough is cool enough to touch, but not too much, gather it together and knead in a rubbing motion so that the dough becomes smooth and malleable. The flat surface of the container makes difference to the smoothness of dough. If you don’t have one as you see in the image, use any bowl to mix the flour with hot water and then turn it out onto your counter or a cutting board to knead.
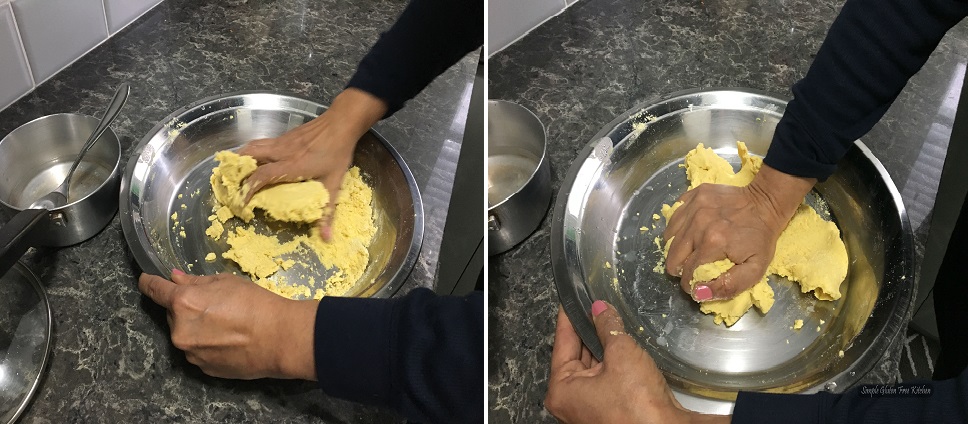
The dough should be firm but not very hard or roti will be hard too. And very soft sticking dough will make it very difficult to make roti. So adjust by adding more corn flour or hot water if required.
Making the roti
Start making rotis as soon as your dough is ready. This is not a dough that you can let sit.
Place a tava on medium heat so that it is nice and hot when you put roti on it.
Dip your hand into warm water, pinch off some dough to knead.
Each dough ball is kneaded individually using the heel of your hand to make it more pliable. Place a damp paper towel over remaining dough to prevent a crust from forming.
Traditionally, makki ki roti is prepared by flattening a dough ball into round shape by repeatedly pressing it in wet palms in a thumping motion. However, this method is difficult and requires some practice. To overcome this a plastic sheet technique is used to pat it easily.
Cut one piece of plastic sheet and lay on the rolling board or cutting board. lightly oil it.
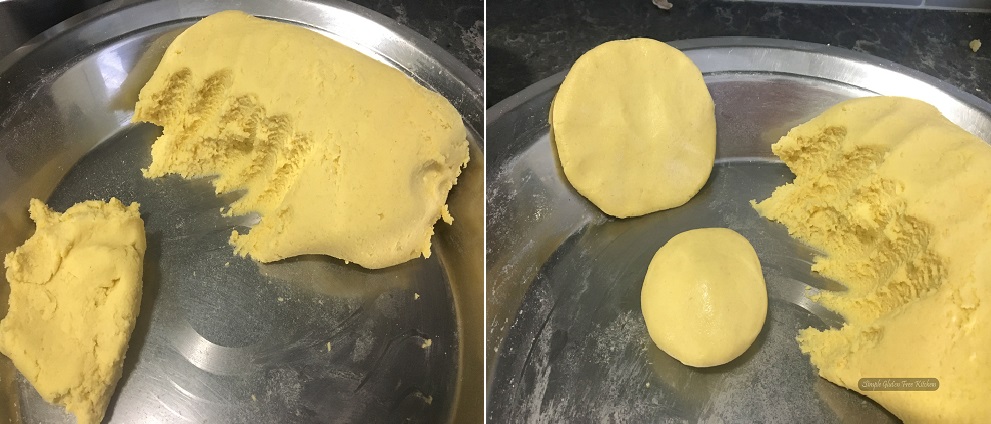
Dip hands in warm water and form one smooth ball. Remember while making makki ki roti water is your friend, but in moderation. Use only as much as you need to keep the dough from sticking to your hands. (If at anytime you find uneasy to use water put a small amount of oil on your hands. When makki ki roti is made in the Gurudwara (sikh temple) at a large scale, workers always oil their hands).
Flatten the dough ball a bit using palms. Then place it on the oiled paper.
With wet hands, press and pat the flattened ball into a circle of about 8 mm thickness.
What is a tava?
Tava is basically a flat pan made from iron sheet. It is used in Indian cuisine to prepare all kinds of chapati or for quick frying on the stove-top. You can search online or an Indian store if you want to purchase one. A cast iron pan or a non stick skillet works just as well for cooking these roti. In fact, I use both for faster cooking.
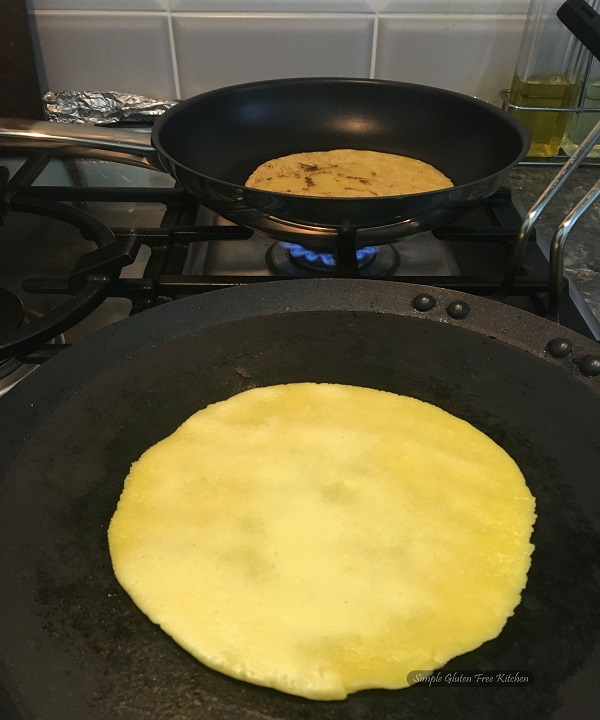
Cooking the roti
Once you have flattened the roti out, lift it off the rolling board and carefully peel the plastic.
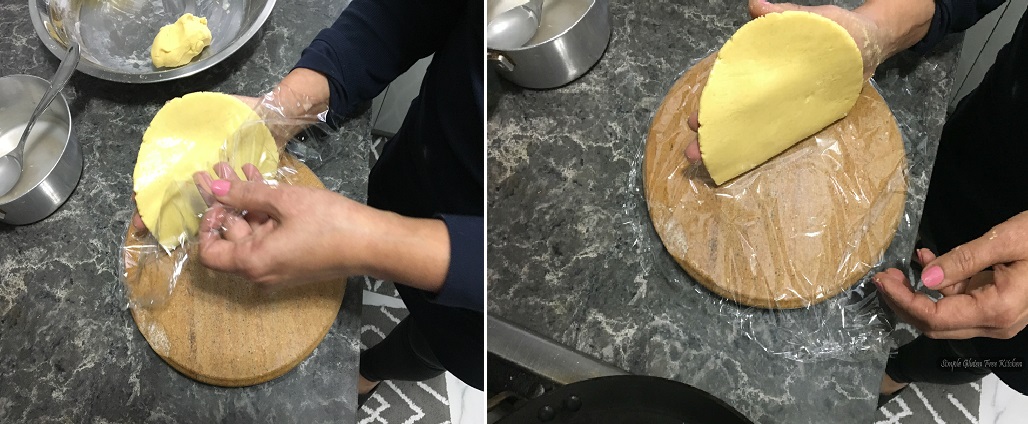
Place onto the tava gently using both hands (this might be tricky if you are beginner). A strategy that my mom taught me is that water side faces down and greased part stays on top.
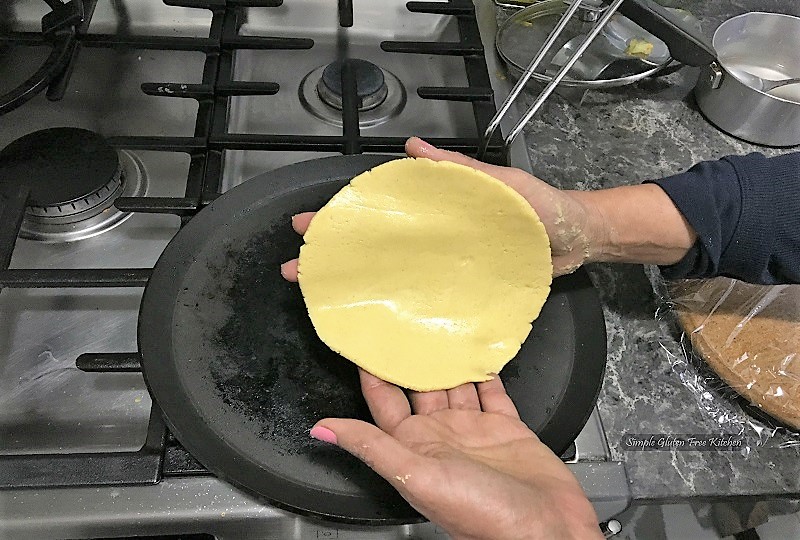
Oiled part is facing up
This helps the roti to stick to the cooking surface immediately and cooks evenly. If the greased part faces down it will still cook but then you need to press down in the center with spatula to make it stick and it won’t cook as evenly as you see in my (after flipping ) image. If you are patting the roti with wet hands then any side can touch the griddle.
In about 40-60 seconds the roti will be ready to flip but it won’t be fully cooked. See the photo for a visual as when to flip.
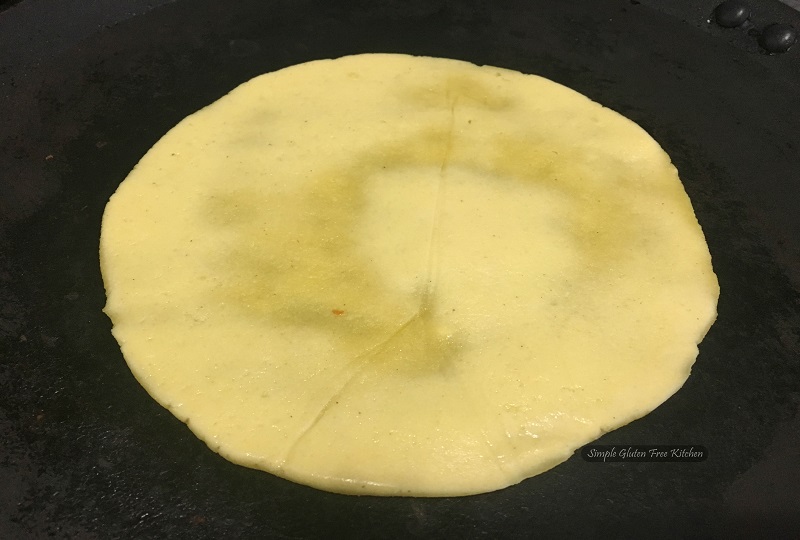
Time to flip
With the help of spatula turn the roti over to the other side ( experienced roti makers flip with their fingers). When it is flipped it looks like this.
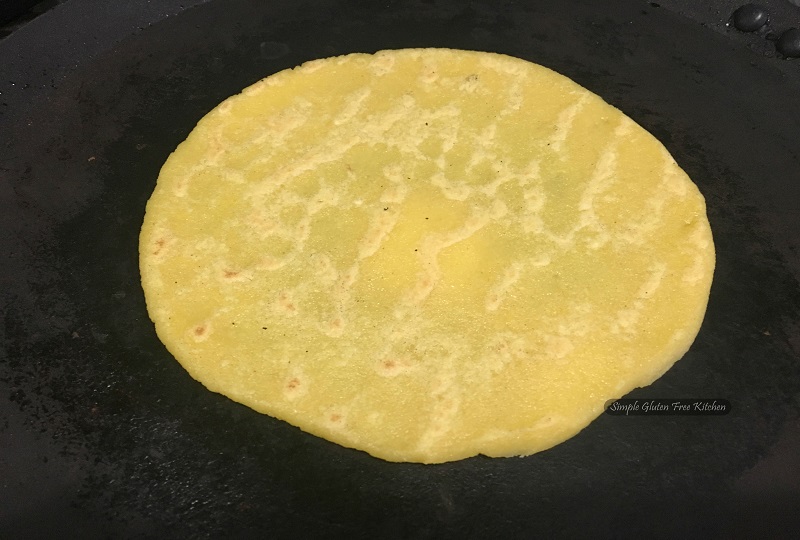
After flipping
Cook until brown patches begin to form. Now the main thing is when you put makki ki roti on tawa, flip the roti only twice, like many people flip it 3 to 4 times, don’t do that, just let it cook on one side little bit then flip it and let it be cook fully and then flip to puff up.
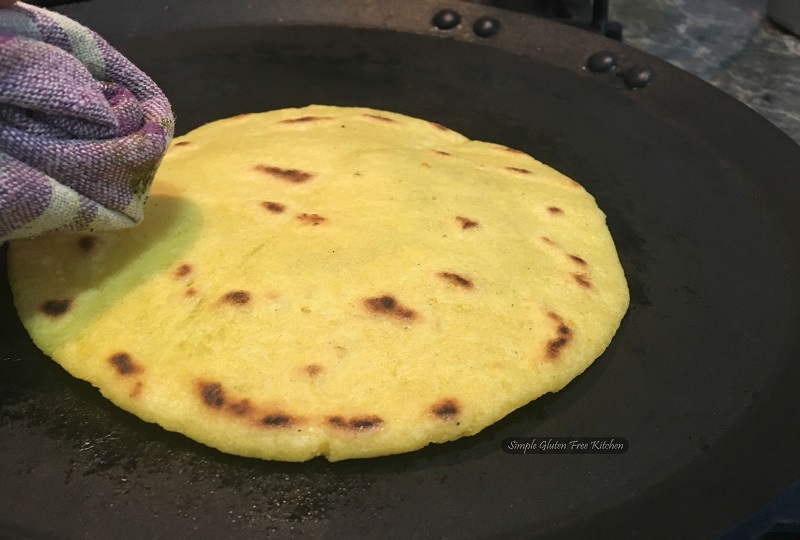
This is how much it puffs up
So, using a folded kitchen towel press down on the roti firmly for a couple of seconds, while rotating at the same time, to allow the steam to expand inside. If all has gone well so far, the makki ki roti will swell slightly. This cooks the dough in the interior. If you like your rotis crispy, then toast quickly on an open flame with tongs.
The above three photos give you a visual for what a makki ki roti should look like at each phase of cooking.
When the roti has cooked well, take it off the tava and store between clean kitchen towels to keep warm while you continue making the other rotis.

Makki ki roti is usually eaten immediately after being made, but if you are going to be serving them a little later, then you should wrap them in a kitchen towel and keep in an insulated container. This will keep the rotis warm and soft until serving time. Or you can partially cook the rotis, stack up between the waxed paper squares, wrap in foil or put it in a zipper bag wrapped in cloth. This way they can be held at room temperature for 7-10 hours. When you are ready to eat, heat the tava or a pan and complete the cooking.
Don’t keep it in the fridge as the cold air makes them dry and hard. However, if you must have to keep it in the fridge then heat the roti in tava or pan, brushed with oil. Sprinkle salt and red chili powder, cut into slices and enjoy with coffee, tea or any warm drink.
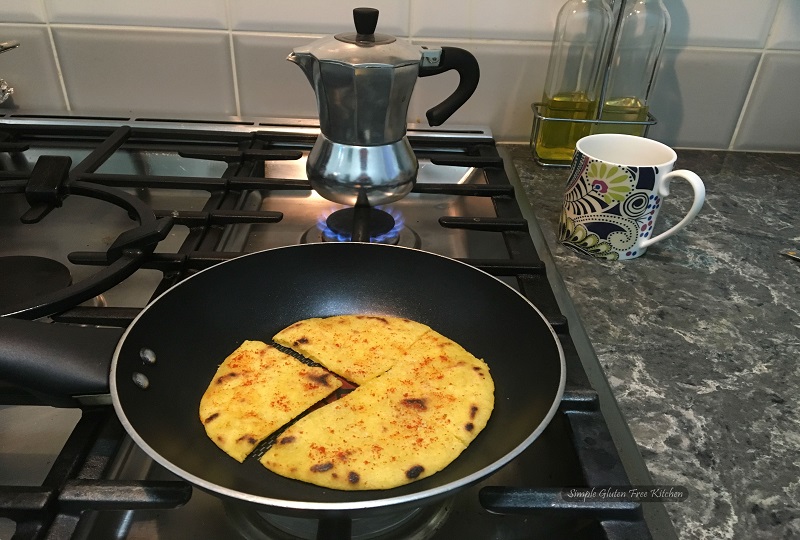
If you carefully follow the above tips your rotis are going to turn out extremely delicious and soft.
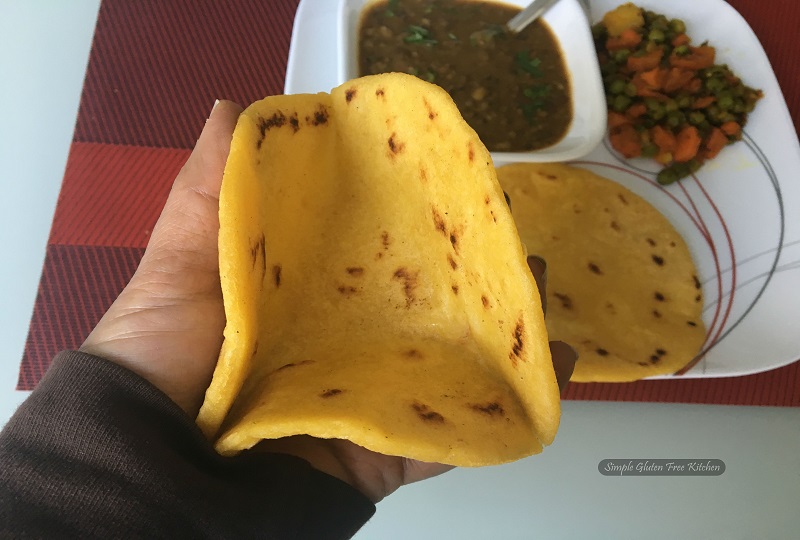
look how soft it is
So don’t be afraid and give it a try and let me know how you get on, I would love to hear your thoughts. Let’s stay in touch.
You can find me on Facebook, Twitter, Instagram and Pinterest.
A rustic corn flour flatbread from northern part of India, that happens to be gluten free and vegan.
Ingredients
- Certified gluten free yellow corn flour
- Hot water for kneading the dough
- Oil
Instructions
- Take about 2 cups yellow corn flour for 4-6 rotis in a flat bottom container. Pour hot water over it and mix with spoon till it binds together, still crumbly.
- Let it cool down enough to touch, but not too much. Gather it together using all fingers and knead with a rubbing motion so that the dough becomes soft. Add more water if needed. Cover with a wet paper towel.
- Heat a tava or nonstick griddle on medium high heat.
- Pinch off some dough. Wet your hands with hot water. Using the heel of your hand knead the (plucked) dough again. This will make the dough more pliable.
- Using wet hands form one smooth round ball by moving the top hand in circular motion and flattening it slightly.
- Transfer the flattened disc on a greased plastic paper.
- Pat it into a 8 mm thick circular disc, in between wet your hands in bowl of water.
- Lift the roti and place the wet side down on the pre heated tava (when it is hot water drops should sizzle immediately).
- Cook until one side has slightly cooked, flip with a spatula and cook the other side till it gets brown spots.
- Turn the roti again and now you can press the roti in different places with a cloth to make it puff up a bit. Or hold it over a medium flame, with flat tongs place until it puffs up or get more browns spots.
- Place in an insulated or airtight container lined with kitchen towel.
- Cook all the rotis similarly.
- Serve Makki ki Roti topped with butter or without it with any lentil, vegetable, or curry.

Jess
I absolutely love the “look” and “feel” of your pictured makki ki roti! … never had this before but would like to try this myself!
Thanks for posting!
Balvinder
Thank you for the kind words, jess! Let me know how it turns out.
angiesrecipes
I love the naturally yellow colour and they look so good too!
Balvinder
Yes, the color of this roti is very attractive compared to other flatbreads
Tarnjit
What a detailed account! I love the pictures too. I haven’t had much success with makki di roti in the past, but I’m going to give it a shot with your suggestions. I didn’t realize the water temperature would make a difference. And I’ve never achieved the softness so captured in the photo. Thanks so much and I’ll keep you posted on my trials.
Balvinder
Thank you for the compliment my dear! I love getting feedback from friends.
Yes, I know it sounds ridiculous but the temperature of water does make a difference. The room temperature water will not bind the dough properly and the boiling water will make the dough pasty and the rotis also come out pasty from inside.
Just try and whats app me the picture. Have a great Sunday!
evi erlinda
A sweet memory about your mom, and this bread is so special. I had tried this roti from my Pakistanis friends, it was SO good.
I also love paratha and naan.
Thank you for the recipe and photos, I am so excited to give it a try.
Judee
Thank you for this wonderful recipe. Being gluten free it’s always nice to have a bread that I can eat. It doesn’t look too difficult , so I might give it a try.
Swati
Wonderful step by step procedure with tips and tricks for those who miss mom’s makkai ki roti are looking for perfect method to cook these.. your rotis look perfect and so soft..
Laura
What a gorgeous color these roti are! I love that it’s just 2 ingredients, yet looks so tender and chewy! Thanks for the instruction, too! Love that it’s from your childhood, too!
Katerina
I think flat bread is an essential part of many cultural diets including Greek. We have pita bread which is something similar to roti. I love the vibrant yellow color because of the corn! Looks delicious!
Easyfoodsmith
Can’t imagine winters without makki ki roti.
Jeff the Chef
I make these somewhat frequently, but think of them as corn tortillas. Is there a difference?
Balvinder
Jeff, corn tortillas are made with masa harina which is a type of corn flour made by soaking corn kernels in lime or wood ash where as these rotis are made with yellow Corn flour, made by grinding untreated corn kernels.