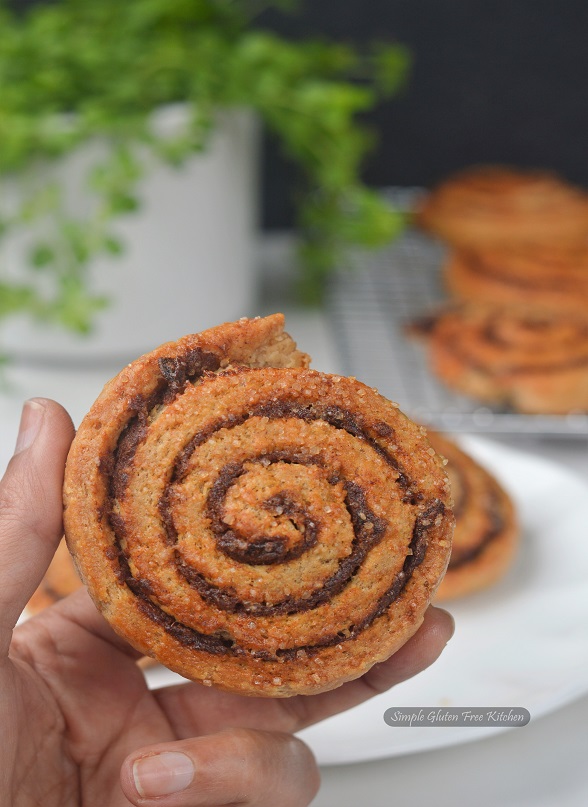
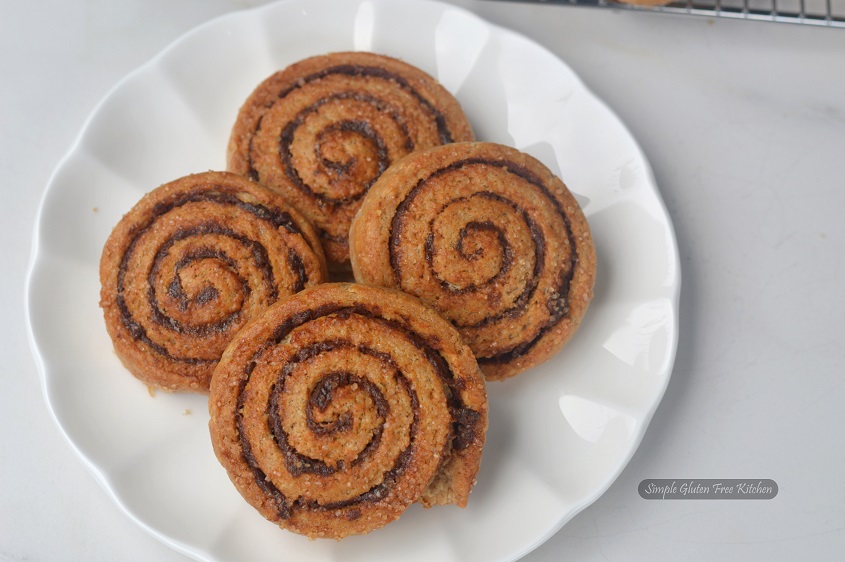
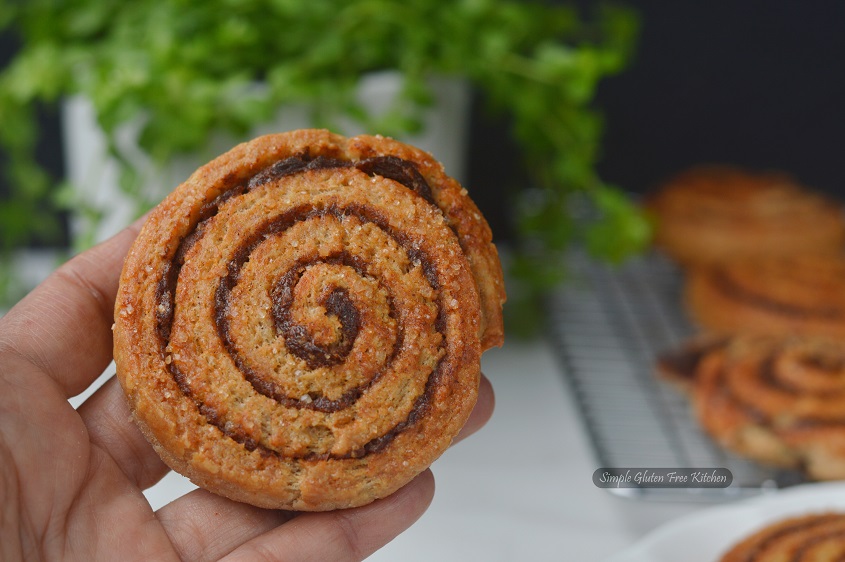
I love Danish pastries but Danishes with no gluten are difficult to come by. So when I want to treat myself, I tend to prepare it at home with sugar substitutions or reduced sugar, just as this Kanelsnegle. Kanelsnegle translates to cinnamon snails. Almost everyone who has tried gluten-free pastry baking knows the challenge of achieving a flaky texture one would get when using traditional wheat-based flours. But I managed to get fairly close what you can achieve with gluten and it is worth it. ( Watch the recipe in a video on YouTube) This recipe does not use granulated white sugar or any type of glaze as is used in traditional Danish. Instead, it relies on a natural sugar boost from date paste and a little unrefined sugar. It is the tastiest and most satisfying sweet treat, perfect for afternoon coffee or as part of the breakfast table.

What is Danish pastry?
Danish pastry, also simply referred to as Danish, is a multilayered light crust sweet pastry. There are so many variations. You start with a square of dough, that you can fold into many different sizes and shapes and fill with a filling of your choice. They are typically filled with fruit preserve, chocolate, cheese, dried fruit, custard, sweetened cream cheese, or almond paste. Cinnamon snails that I am sharing with you all today are an old Danish tradition in baked goods, which have a lot of history behind them.
As with any pastry, this gluten-free cinnamon date snails recipe is a labor of love. It is not difficult to make but you need to plan in advance, as the dough needs overnight rest.
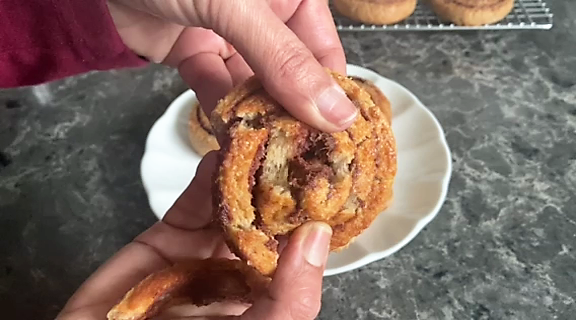
I’ll walk you through the whole Danish-making process with a video on YouTube. I’m afraid I wasn’t able to take the step by step pictures but managed to get a few still images from the video.

There are three basic steps to make the pastry dough that include preparing the dough, enclosing butter in it, folding and rolling the dough, and then chilling. So please do take the time to read through the recipe a couple of times before beginning.
1. Preparing the dough
Make sure you weigh your ingredients for the best results. The whole process takes several hours and it’s important not to rush.
Flour – I have tested this recipe many times and have found that gluten-free flour blend made with superfine flours work the best. However, it does work with a homemade plain gluten-free flour blend too.
Butter – Any good, unsalted butter will work but it is best to use European butter for a delicious taste and richer texture. European butter has a high-fat content. And, high-fat means less moisture, which can cause the fat to melt and create steam in the pastry when baking.
Psyllium husk powder – This binding agent is essential for ensuring that gluten-free dough is workable. The gluten-free baking flour that I used does have some xanthum gum but psyllium husk helps with the extensibility.
Yeast – I like to use instant dry yeast. It does not need to be dissolved and just add it in like any other ingredient. But, you can certainly use other varieties of yeast.
Egg– I always use large eggs in my baking unless otherwise noted.
Coconut palm sugar– As you can tell from the photos, coconut palm sugar gives a little caramel color to the pastries. I love its taste and is less sweet.
Baking powder – It gives the pastry a smooth, soft, and fluffy texture.
Milk – I typically use 1% (low fat but not skimmed) milk when I bake because that is what I keep in my kitchen regularly.
The kneading of the dough can be done either in a bowl of a stand mixer or by hand. I often double the batch and use the stand mixer because of the time invested. Then freeze half the dough for later. The texture of your kneaded dough should be soft and smooth. Press into a square on a flat surface. Cover it with plastic wrap, and chill it in the refrigerator for 60 minutes.
2. Lamination
Once the dough is finished kneading and in the refrigerator, you will prepare the butter for lamination. Lamination is the technique of folding the butter into the dough. It involves creating a butter square, which is just butter pressed together into a square between two sheets of parchment paper. I use a rolling pin to press down the slightly softened butter to form a square of 6×6 inches, then it needs to be refrigerated so it is completely cold when wrapped in your pastry dough.
On a floured counter, roll the dough out so that it is about three inches larger than your butter square. Place your butter square into the center of your rolled-out dough so it looks like a diamond. Then fold in the corners so all of the corner points of the dough meet together in the middle of the dough. Brush off excess flour so that the dough gets a good grip on each other. It will look like a greeting card envelope. After this lamination step, the dough will go into the refrigerator to get nice and cold for 4 hours or overnight.


3. Folds / Turns (Watch Video for better understanding)
Once you place the butter square into a dough envelope, you will roll out the dough with the butter inside into a large rectangle then you will fold that rectangle into thirds, like a letter is folded to fit into an envelope. The dough and butter square should have the same consistency when you roll. This is what allows you to roll the dough in the many layers without any problems. The dough should be rolled and folded 3 × 3, meaning that you have to roll out the dough, fold it over itself in thirds and roll out again three times. Rotate the dough 90 degrees (means the short end is towards you) between each roll once you have folded it. That way, you get the edges into the dough every time, and the layers become uniform. If the rolled-out dough does not come out even on sides ( this does happen with gluten-free pastry dough) don’t worry; you can trim the edges and patch as needed. When folding the dough inside itself, brush excess flour from the top of the dough. There is no need for extra flour into the dough, you just need it to roll out and most importantly, handle gluten free dough gently. If, at any time, you find your dough is getting too soft or overly sticky when rolling, then return it to the fridge or quick freeze until it firms up and continue working where you left off.
After the third fold, transfer to the fridge for at least 4 hours or until cooled. This can be cooled for up to 48 hours. I like to let the dough chill overnight and then bake it up the next morning. It can be frozen at this time for later use.

After chilling of the dough, you roll out once more roughly to a size of 9″x13″ rectangle. The dimensions don’t have to be exact but the dough should be 1/4″ thick. Spread your filling evenly on top and roll it up into a log. The date filling is quite firm so first drop spoonfuls at several places then spread with your finger.
Once you’ve rolled the date paste-filled pastry dough, trim the edges, cut into 1/2″ slices. Place on a baking sheet lined with parchment paper. Let them proof for 45 minutes in a spot that is not too warm and not too cold. They will not increase in size but will become puffier. Brush with a beaten egg and water mix. Sprinkle turbinado sugar. Bake in the hot oven for 20 minutes.
That’s it! Quite long, but, not too complicated for making your own Danish pastries. These are best enjoyed on the day they are baked but, you can store for 2-3 days in an airtight container and toast in a toaster oven or Air-fryer for 3 minutes. I’m pretty sure I’ve convinced you to make these delicious cinnamon snails for Christmas breakfast or tea break. Do let me know how you get on and perhaps tag a picture of your attempt on Facebook or Instagram with hashtag #simpleglutenfreekitchen.
If you love this recipe, you will also love my gluten-free orange rolls and baked apple roses.

Ingredients
- 210 gm (1 1/2 cup) 1 to 1 baking flour blend by bob's red mill or cup for cup flour blend from cloud 9
- 9 g (3/4 tbsp.) psyllium husk powder
- 3/4 tsp baking powder
- 4 g (1 1/8 tsp) instant yeast
- 1/2 tsp salt
- 4 gm (1 1/2 tsp) sugar coconut palm sugar
- 30 gm butter ( a little over 2 tbsp) at room temperature
- 1 egg at room temperature
- 1/2 cup (+) milk
- Additional GF all-purpose flour for dusting
- 125 g cold (not chilled) unsalted butter can use up to 225 g (European butter recommended)
- 1/3 cup date paste
- 30 gm unsalted butter
- 2 - 2 1/2 tsp ground Cinnamon
- 2 tsp hot milk
- Turbinado sugar
- Egg wash (1 egg + 1 tbsp water or milk, whisked)
Instructions
- Pour milk in a cup. Crack an egg into it and whisk.
- In the mixer bowl, mix flour with salt, baking powder, coconut palm sugar and instant yeast.
- Add butter, working it in with your fingers or with dough hook, mix until no large lumps remain.
- With the mixer running on low, add the milk mixture all at once and mix just until it is absorbed. Then Increase the speed to medium (5 or 6 on Kitchen-aid) and mix, about 2-3 minutes, or until the dough clings to the hook. Scrape down the sides when needed. The dough should be pliable and soft. If it feels firm, add milk as necessary.
- Place dough on a plastic wrap. Spread it with your fingers into a square (size doesn't matter but 6 -7 inches is fine). Wrap and place it in the fridge for 60 minutes.
- Allow butter to soften a bit (still has to be cold but not hard). Place between two pieces of parchment or wax paper. Sprinkle flour on both sides. Using a rolling pin, crush butter and roll out to 6x6 inches ( I take one parchment paper and fold from four sides measuring at 6"). Keep the butter square in the refrigerator for 45 minutes (We want it cold but still be flexible so that when we roll it will spread between the layers of pastry).
- After one hour of cooling, place dough on floured surface and roll the dough into 10" square. Brush off excess flour from top of dough, place butter in the middle in diamond shape. Fold the four corners of the dough down over butter and seal it properly.
- Roll out the dough again to a 16”x10” rectangle after sealing butter. Before rolling flour above and beneath the dough as necessary so dough does not stick. Roll out dough to a 16”x10” rectangle to make first turn. Brush off any excess flour and fold top of dough down towards the center of dough. Fold bottom half up towards the center as well (like a book, watch my video on YouTube for better understanding)). Brush off any excess flour again, and repeat these book fold steps two more time. If necessary, wrap dough and refrigerate between folding in order to keep the butter from melting.
- After the last turn, wrap dough well in plastic and refrigerate at least 4 hours or overnight. This can be cooled for up to 48 hours.
- Give it a 90°; turn, and repeat the rolling and folding process two more times.
- When ready to bake, make the filling by mixing date paste, softened butter, milk and cinnamon.
- With the short side facing you roll out dough to 13"x9" rectangle, about 1/4 inch thick. Drop small spoonfuls of filling at several places. Spread it with your finger. Roll up, starting with the short end into a log.
- Cut rolls into 1/2-in. slices ( you can cut using a thread, knife or bench scraper). Place 2 in. apart on a parchment lined baking tray.
- Cover with plastic wrap and allow to rise on the counter for 45 minutes (they will not visibly double in size but become a little puffy). Preheat the oven to 425 degrees F.
- Once ready to bake, brush with beaten egg (1 egg whisked to mix with 1 tbsp water) using a pastry brush. Sprinkle turbinado sugar and put into the oven and bake for 15 minutes. Then lower the temperature to 400 or 375 degrees F, and bake for another 10-15 minutes or until they are golden brown in color.
- Allow to cool on cooling rack. Best when freshly baked, but can be reheated in toaster oven or Air fryer to eat the following day.
Notes
1. I have not given you the prep time as this isn't a quick recipe.
2. If you can not find the store bough flour blend that I used in this recipe you can make the flour blend at home blend using millet flour, tapioca starch and rice flour from my pie crust recipe. This blend is for two pie crusts I would recommend you use half and then adjust and add other ingredients from the above pastry dough.
3. You could use 1 cup of butter in lamination for more flaky layers

angiesrecipes
They turned out really perfect. Good job!
Healthy World Cuisine
Love those step by step photos. Very helpful. Your cookies are so pretty and crisp. Perfect with an afternoon cuppa.
Judee
They look beautiful and I appreciate that you showed the photos step by step. I am always happy to have a gluten free recipe treat. Thanks Balvinder and enjoy the holidays!
Pattie
These look bakery shop quality, and absolutely delicious! I’m intrigued by one of the ingredients, date paste. I don’t think I’ve seen that before, but I can imagine quite a few uses for it. Well done here!
2pots2cook
Love how you combined dates and cinnamon ! Special thanks for the link to your version of paste. I am so happy to see it needs just several minutes to make it !! I wish you and your loved ones to have happy and healthy 2022. !
John / Kitchen Riffs
These look great! And I’ll bet they taste great, too. Thanks! And Happy New Year!
Keira Ball
Looks delicious. Thanks for sharing step-by-step photos.